

My clients often hear me say that good ground soil in earned here in Houston. I usually say this because it’s near impossible to build great soil in 1 year. That’s not to say that you won’t get good production from a raised bed fresh from the store soil. It’s because you will always get the best production from a well amended in ground bed that has cultivated an underground ecology that nurtures “friendly” microbes and animals, promotes plant health, and is regenerated by the death to nutrient carbon cycle that keeps our planet going. Good soil does all of this and cannot be bought at a store. You can have this in Houston! We’ve got your guide right here":
Learning Your Space
If you wish to grow things, especially edibles, directly into the soil, I recommend doing a full site assessement. You want to understand how sun, water, and soil grade and content are working together to get the behavior you have right now. These are the aspects that no amount of soil building can really do anything about. For instance, is the area prone to standing water or being wet? Can you get irrigation to that spot? How many hours of sun do you get? What does the soil say about underlying nutrients? If you’re worried about lead or other metals in the soil, have your requested a heavy metals test from the Texas A&M soil lab? Once you know what you are working with, you can make the call on where to spend your energy with a new garden bed.
Going Vertical- The Lasagna Method
There are some great methods to preparing in-ground soil that involve tilling the earth or double digging with amendments, but I am an inherently lazy gardener. I don’t dig if I don’t have to. That’s why I nearly always go up instead of down. The lasagna method is a regenerative technique that builds soil by building up compostable materials in layers. There is a LOT written about how to do this method but no matter how you lasagna method, the 3 keys are simple:
1: Layer cardboard over freshly cut grass or groundcover. It’s okay to overlap carboard but remove all tape. This kills the grass but breaks down over time. By the time it’s worn down, you’ll be able to easily cut through it to plant.
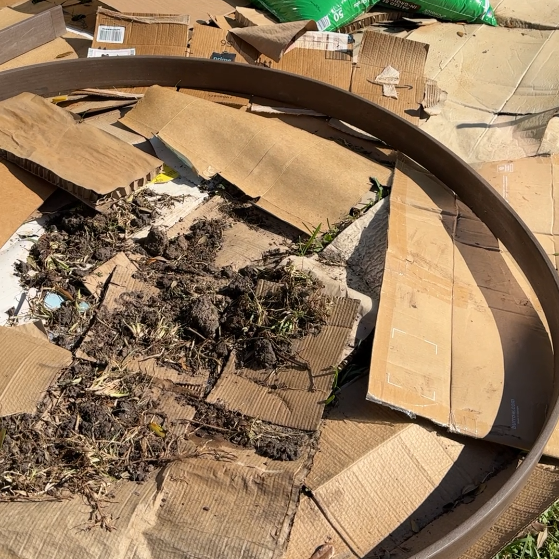
2: The next part is to alternate layers of “green” materials with “brown” materials until you’re clost to the desired height. Green materials are like grass and kitchen scraps, whereas brown are old wood, mulch, and leaves. Manure is surprisingly a “green” during this. There should be a 3:7 volume ratio of greens to browns. Again, I’m a lazy AND cheap gardener. I wait until fall when I can collect the discarded cut grass AND fallen leaves from my neighborhood. I only add one layer of grass clippings/manure and 1 big layer of mulch/fallen leaves, but you get better results if you alternate a few times. These layers break down into compost and eventually work into the soil once the cardboard breaks down.
3: The final layers are a dose of compost and mulch. This is crucial to me as a landscaper because these are the layers I plant in immediately. The mulch also makes it the bed look official to the neighborhood while discouraging weeds.
Going Vertical - My Way
My way is based on my experience of doing landscapes, not having time or access to enough material at planting, and leveraging plants that don’t need many nutrients off the bat. I keep the layer of cardboard, because I need something to kill grass without locking out the plants I put on top. Instead of “browns”, I layer a ton of dye free native mulch with really great compost as my green. That’s it. Is it as nutrient rich as the previous method? I would argue that it depends on the compost (GroundUp and FarmDirt are my favorites). Can I plant my trees “high” using this method so that my trees can still get good drainage as the mulch breaks down? You bet. Can you add some MicroLife fertilizer or manure to get the nutrient train on track quickly? Yuppers. Does it allow me to plant after 6 weeks? Yes. Does it work? Oh yeah.
Planting Nitrogen Fixers
If you have chosen my way, you’re going to get more nitrogen from somewhere. My favorite way is planting nitrogen fixing plants right away. I sow handfuls of clover, yarrow, and pea seeds while the garden gets going. They don’t have to stay there forever. I can even treat them as cut and drop green mulch when I move in my “real” plants.
Be Kind to Fungi
There are going to be mushrooms and lumps of fungi on the surface as everything breaks down. Don’t panic. This is a natural ecological process. The fungus is breaking down the wood and other products in the soil, so congrats on having a working system. That said, if the area is constantly wet (not damp) or dries into a thick mat, it can harm the nearby plants. Either reduce the amount of water the area gets or break up the mat.
Welcome Critters and Be Wary of Chemicals
After the fungus, worms, centipedes and other critters become a visual signal that your soil is alive and active. If you’re not a bug person, think of them as a competent co-worker you don’t like personally. Just because you find them annoying, doesn’t mean you can’t work together. Nothing throws your new ecology off balance quite like a spray fungicide or a broad spectrum herbicide, so learn to manage your pest in gentler ways.
Seasonal Maintenance
I add a 2” layer compost in spring and/or fall to add fresh organic matter before I plant new annuals or perennials. I also add mulch twice a year, in May and November. In May, the mulch helps to soil retain water. In November, it’s to protect the roots of my perennials from frost. As these layers break down, they continue to aid amend the soil underneath.
Building soil does take work and investment but it yields the highest plant returns. If you take care of it, it will take care of you.